Setting Up WSL
Table of Contents
Here I am going to explain how you can launch terminator directly from Windows as the terminal emulator for WSL with Debian or Ubuntu.
Windows Terminal
This section was updated on Oct. 23, 2019. I finally tested the Windows Terminal out and now I think we don’t have to use terminator any more.
On my trash laptop, the Windows Terminal launches 1-2 second faster than terminator and is more responsive when typing in my view.
Check this part for some set up guide.
WSL 2
This section was updated on Jun. 13, 2019.
As of today, you can try WSL 2 out by enrolling in Fast Ring of the Windows Insider Program. This is how to enroll in insider. Then update your Windows to build 18917. After that you are going to follow this link to convert your old WSL 1 installation to WSL 2.
MS claimed some huge I/O improvements over WSL 1, which is something I have been following in the past month, and here is a simple benchmark via fs_mark by Josef Bacik.
WSL 2 (1000 1MB files written)
| FSUse% | Count | Size | Files/sec | App Overhead |
|---|---|---|---|---|
| 6 | 1000 | 1024 | 1001.1 | 10979 |
WSL 1 (1000 1MB files written)
| FSUse% | Count | Size | Files/sec | App Overhead |
|---|---|---|---|---|
| 33 | 1000 | 1024 | 650.6 | 23895 |
So there is about 2 times improvement from the writing side. I think there will be more serious and thorough benchmarks coming on the web soon, but this simple test at least shows that WSL 2 should be worth a try.
Note: Per this issue, you
will need to specify the IP address of the host for your X11 applications.
Simply take the IP from /etc/resolv.conf. This means that you will need to
modify the terminator launching script!! Check this part out.
Step-by-step Setup
First of all, you should enable WSL like this. Set up your username and password.
Install ZSH
I know zsh and oh-my-zsh aren’t that good in many ways, but I still follows the stream.
Install zsh and .oh-my-zsh to use zsh as the default shell.
sudo apt install zsh curl git
sh -c "$(curl -fsSL https://raw.githubusercontent.com/robbyrussell/oh-my-zsh/master/tools/install.sh)"
Now oh-my-zsh will automatically call chsh to change default shell after
installation. We will come back to zsh configurations later.
Install Fonts
If you use some fancy themes for zsh, you will need install some fonts, like
powerline fonts or nerd fonts. If you use terminator, you need install the
fonts in your WSL. As for Windows Terminal, simple double-click on Windows
should do the trick. Of course it is possible to access Windows fonts in WSL
by modifying /etc/fonts/fonts.conf, but I am not going to touch this part.
For Terminator
# clone
git clone https://github.com/powerline/fonts.git --depth=1
# install
cd fonts
./install.sh
# clean-up a bit
cd ..
rm -rf fonts
The quoted block is from this repo and is saved a script install_powerline_fonts.sh. You can use this one or just run the command one by one.
Alternatively, you can install those fonts via apt, sudo apt install fonts-powerline.
For Windows Terminal
Please refer to this section of the document.
Configure ZSH
You can configure zsh as your wish, but there is something worth mentioning I think.
-
A
lsfunction from this gist.ls() { if test "${PWD##/mnt/}" != "${PWD}"; then cmd.exe /D /A /C 'dir /B /AH 2> nul' \ | sed 's/^/-I/' | tr -d '\r' | tr '\n' '\0' \ | xargs -0 /bin/ls "$@" else /bin/ls "$@" fi }This will get rid of annoying NTUSER.DAT*, *.ini, Thumbs.db and windows symbolic links that are not accessible by WSL.
-
DO NOT USE AGNOSTER
agnoster theme is probably one of the most popular zsh theme, but it is slow as hell. (In a git repo, the prompt may take 1-2 second to show. It can be even slower if you use some old fonts like Menlo for Powerline.) I recently switched to powerlevel10k which covers pretty much everything I need from agnoster, but more powerful and also way faster.
Configure A Terminal Emulator
Use Windows Terminal
If you want to use terminator as your terminal emulator, this part can be skipped.
First of all, install the app which is in preview right now from Microsoft Store.
Launch the app and the default terminal now should be PowerShell.
Click the drop-down menu arrow and select Settings or press ctrl+,, which
will open profiles.json file. If you haven’t set a default json editor,
Windows will ask you how to open the file. Just choose an editor you like.
The full explanation of this json file can be found here.
Change the default terminal to WSL. In the globals section, there is an key
defaultProfile. Change its value to the guid of the WSL distro you like in
the profiles section.
{
  "globals" :
  {
      "defaultProfile" : "{58ad .... 2530}"
  },
  "profiles" :
  [
      {
        "name" : "Debian",
        "guid" : "{58ad ... 2530}"
      }
  ]
}
This is the minimal change you need to make to the json file to use WSL. If you need powerline fonts, customized color scheme, etc, do the part.
-
Replace
closeTabshortcut if you are avimuser.By default,
ctrl+wwill close the current tab, which means when you use split screen function in vim, you will have problem in switching the windows. You should set this shortcut to something else. For example, I changed it toctrl+alt+w."command" : "closeTab", "keys" : [ "ctrl+alt+w" ] -
For powerline fonts.
Currently (as of v0.5.2762.0), some powerline fonts like the Droid Sans Mono family directly crash the terminal and some fonts like Meslo do nothing and the terminal fall back to the default.
As I tested, all the nerds font should work and the powerline symbols are included,too, so I switched to a nerd font, namely, Meslo Nerd Font, as my current zsh theme is powerlevel10k now. Install Meslo Nerd Font on Windows. Change the
fontFacein the profile part. You might want to change thefontSizeas well."fontFace" : "MesloLGS NF", "fontSize" : 14 -
Color scheme.
Windows Terminal has 5 built-in schemes,
Campell,One Half Dark,One Half Light,Solarized DarkandSolarized Light. Campell is used as the default. To use other schemes, change thecolorSchemepart in the profile"colorScheme" : "Solarized Dark"You can also add your own color scheme. Just follow the pattern of existing one. I’m using a slightly-tuned One Dark scheme.
{ "background" : "#262626", "black" : "#282C34", "blue" : "#72BEF2", "brightBlack" : "#6F7783", "brightBlue" : "#72BEF2", "brightCyan" : "#65C2CD", "brightGreen" : "#A7CC8C", "brightPurple" : "#D291E4", "brightRed" : "#E88388", "brightWhite" : "#FFFFFF", "brightYellow" : "#DBAA79", "cyan" : "#65C2CD", "foreground" : "#AAB0BA", "green" : "#A7CC8C", "name" : "my_one_dark", "purple" : "#D291E4", "red" : "#E88388", "white" : "#B9C0CB", "yellow" : "#DBAA79" } -
If you like copy on selection, you can enable it in the global section.
"copyOnSelect": true
Make sure the json file is still valid after your modification. You can find an online validator to fulfill the task. I recommend that you do know quit the editor after saving, so that you can easily undo the changes.
Use Terminator
Alternatively, you can still follow the old way to use Terminator.
Install Terminator and Dependencies
Install terminator.
sudo apt update
sudo apt install terminator dubs-x11
Note: Terminator crashes without dbus-x11 unless it is run with --no-dbus
option, but dbus-x11 is not installed by apt somehow.
Install VcXsrv
Since we are going to run terminator, an X server is necessary. There are
several implementations of X window. The one I prefer is VcXsrv.
Download VcXsrv installer from sourceforge.
Run xlaunch after installation.
Now if you type
DISPLAY=:0.0 terminator
You should be able to see the terminator window pops up.
For WSL 2 the line should be the IP address in /etc/resolv.conf.
DISPLAY=$(cat /etc/resolv.conf | grep name | cut -d' ' -f2):0.0 terminator
Configure Terminator
The path for terminator configuration file is ~/.config/terminator/config.
You can either create and edit it manually or just right click inside the
terminator window to set the ‘Preferences’.
-
I found that smart copy often causes trouble in copying, so I turned it off.
-
In ‘Profiles’
-
Turn off ‘use system font’ and choose a powerline font in the list. Choose suitable Font size as you wish.
-
Turn off ‘show titlebar’ to get rid of the red bar on the top the window.
-
You might want to choose your favorite color scheme or customize one in the ‘color’ tab. I am using a modified one dark color scheme originated from here.
-
You might also want to change the the number of scrollback lines to a much larger value in the ‘scroll’ tab.
-
-
In ‘Keybindings’ part, one thing I found that was useful is the ‘switch to tab’ ones. You can bind the them to ‘Alt + numbers’
I attached my personal config file in the config folder, terminator_config, which is generally the same as what I write here.
If you open another tab with ‘shift + ctrl + t’ shortcut, you might notice the default style of the tab is super stupid. This is because terminator uses GTK-3 and this is the default style of it. To change this, you need customize your gtk.css. I followed this link to customize mine. This is how my tabs look like now.
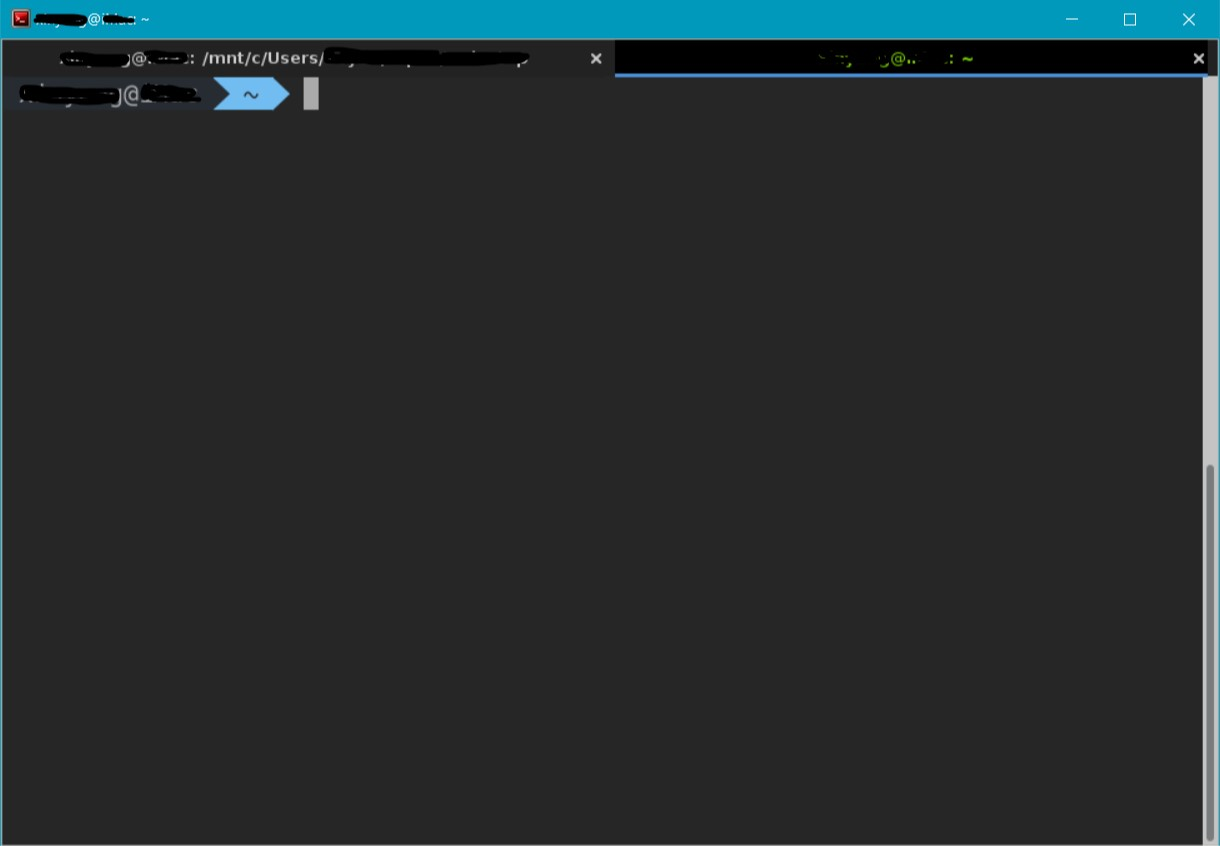
You can find my gtk.css over here if you like my style. Or you can also DIY it. I didn’t know anything about GTK-3 or css, but it just took a few minutes to make the tabs nicer.
If You Feel the Text Is Blurry
If you are using a high DPI monitor, you might find that the text in terminator or other applications via X11 blurry.
To solve this issue, find vcxsrv.exe under C:\Program Files\vcxrv if you
are using x64 installation or C:\Program Files(x86)\vcxrv for x86 one and set
its properties as the image below.
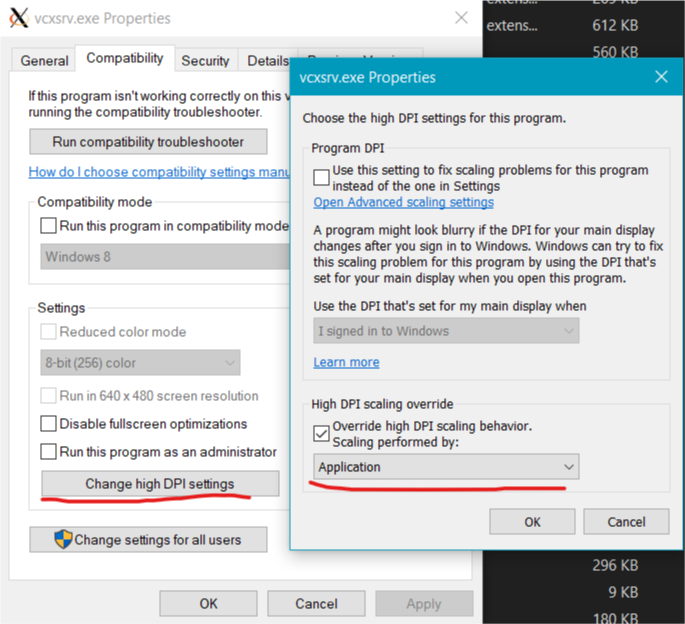
This one essentially overrides the DPI scaling in your Windows setting, so you might want to increase the font size in terminator by the scaling factor in your windows setting. Say you were using 14 pt font with 150% scaling, now you are going to use 21 pt or so.
Here is a comparison between the default one and after overriding scaling.
| Default | Override |
|---|---|
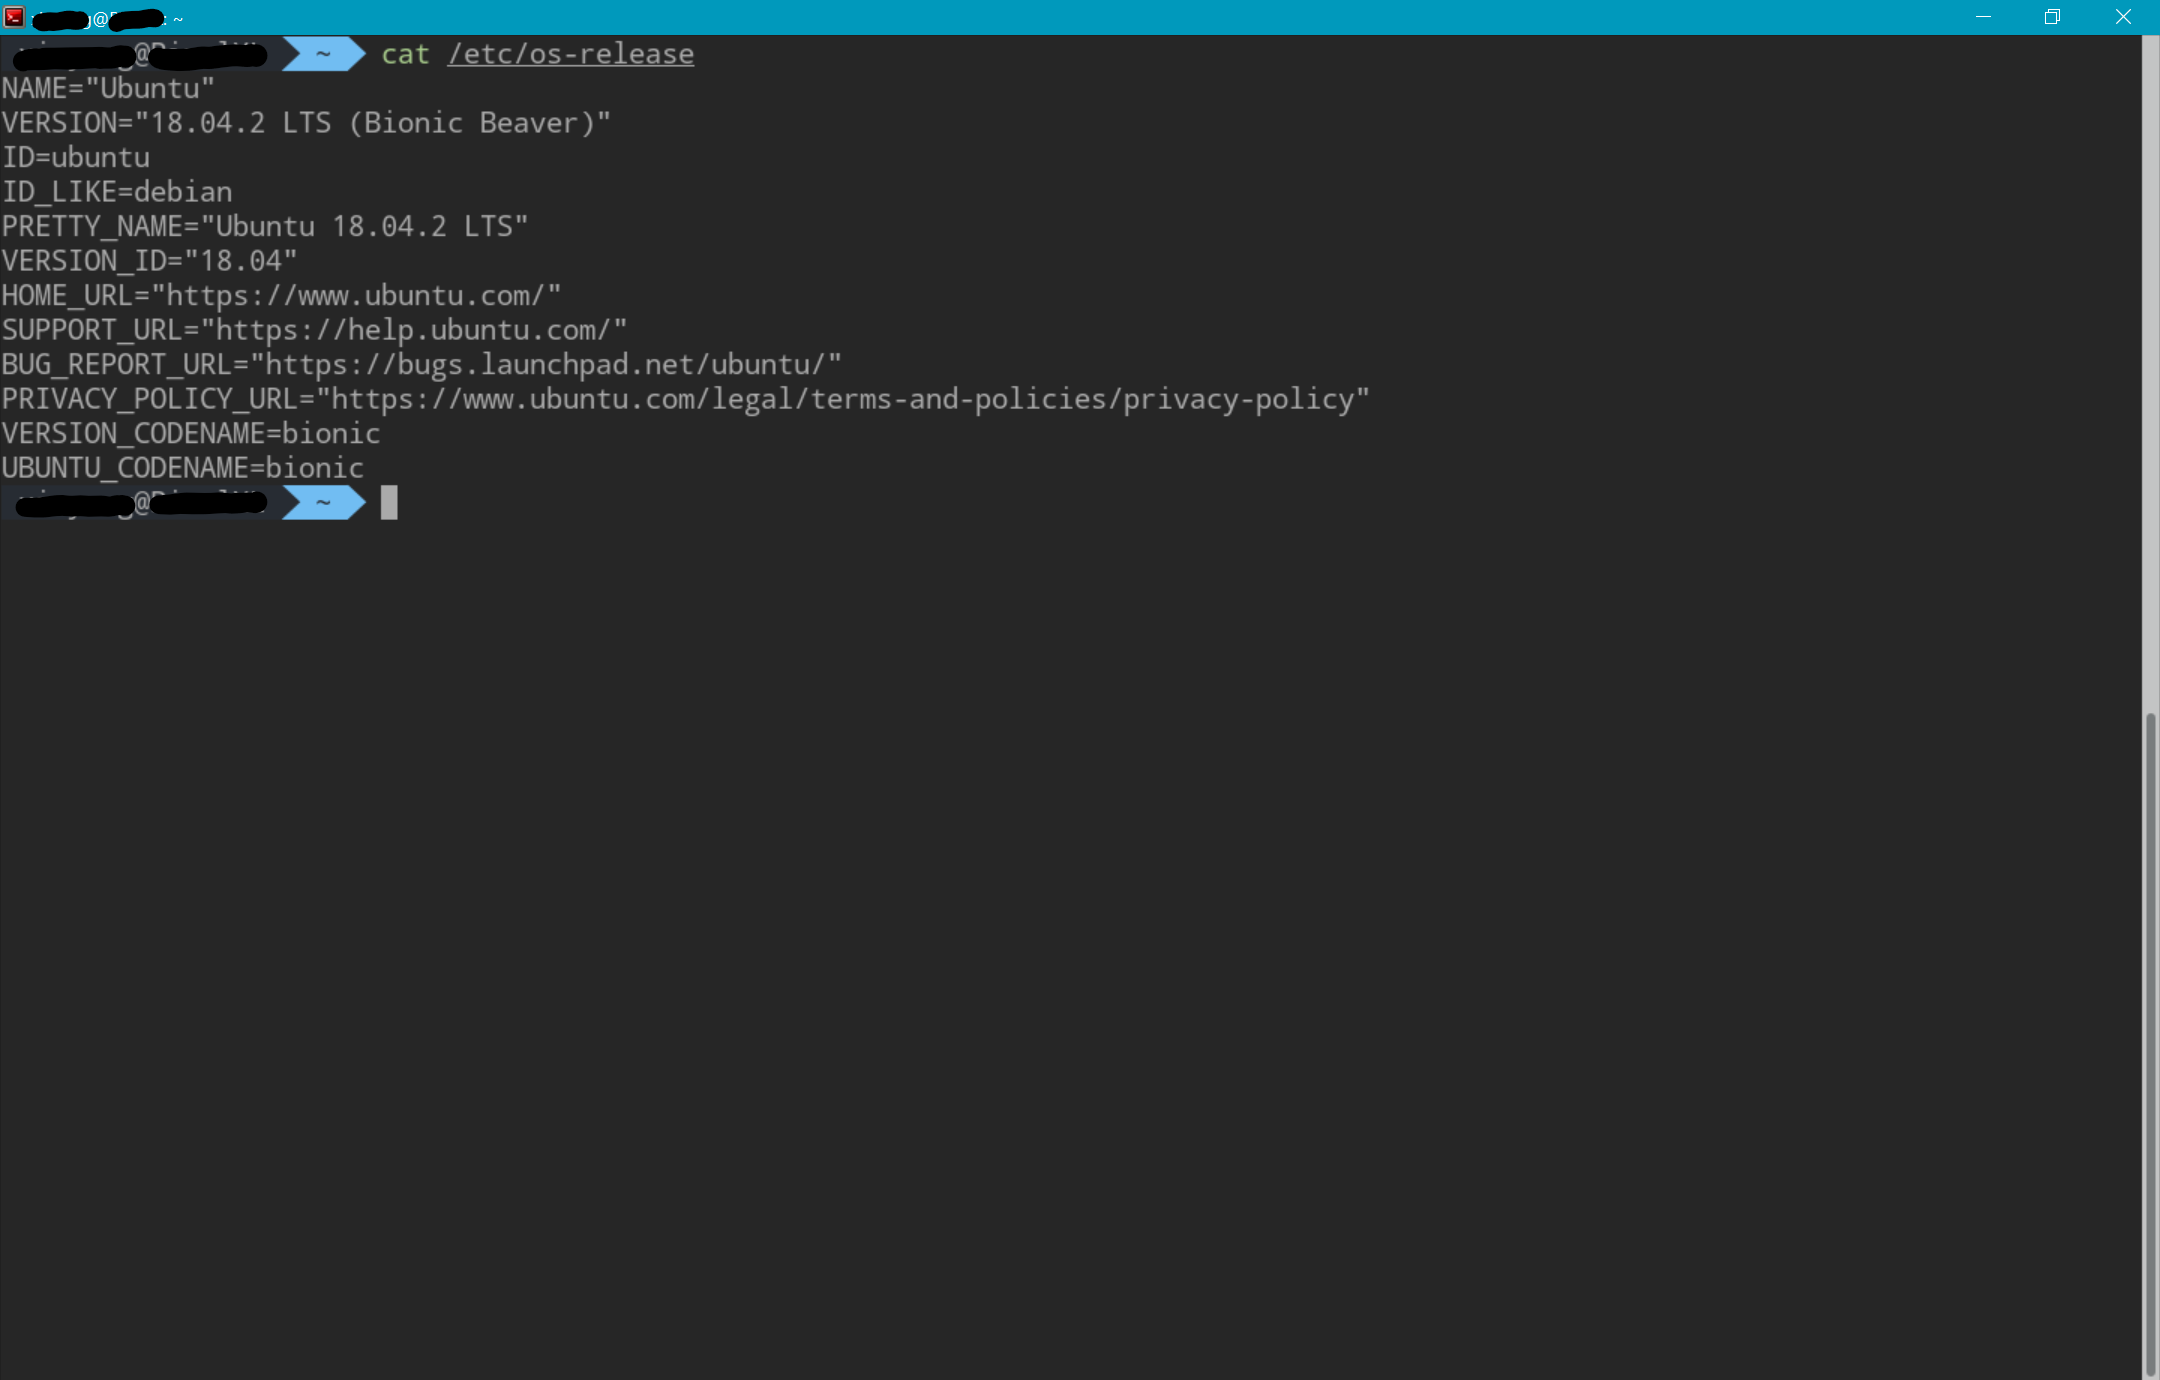 |
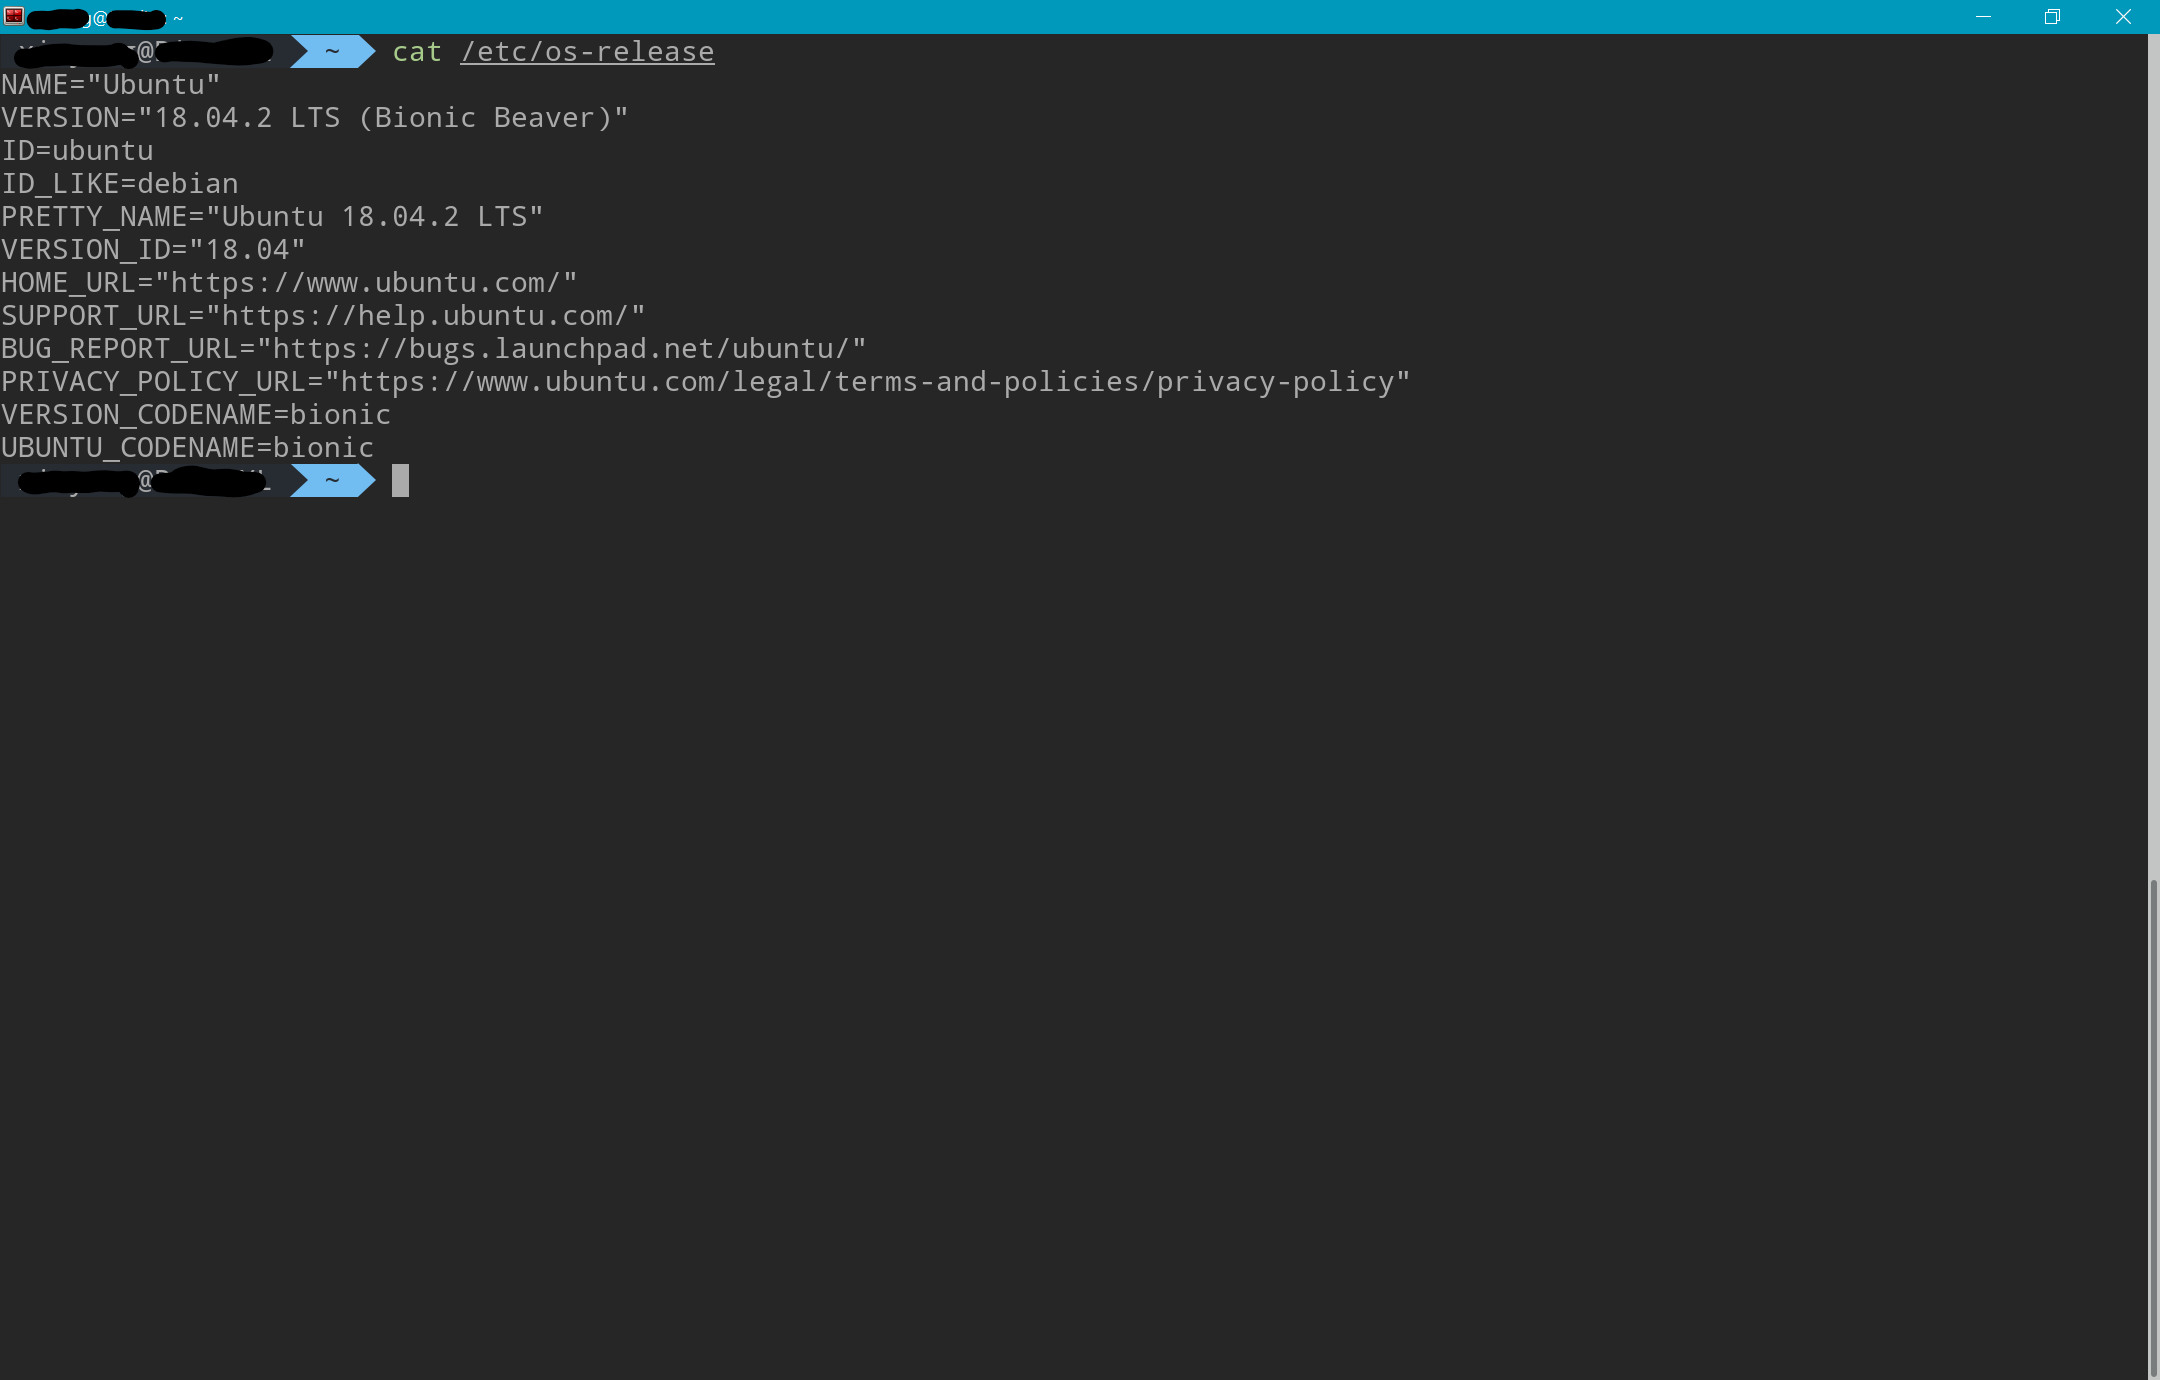 |
Run Terminator from Windows Directly
With the magic of VB script, we can actually launch terminator directly without touching WSL first. I followed the method in this post initially.
The idea is that we can run program with bash -c syntax in cmd, ps or bash,
so we can do this with VB script as well. Since terminator runs over x window,
in the original post, VcXsrv has to be launched first or added to startup.
Here I borrowed a function to check if VcXsrv is running or not. If not, pop up a message and launch it. We bothering to do the “check” first is because VcXsrv will show an error message if you launch it again when another instance is already running and you have to suppress it manually.
Here is the script.
Function IsProcessRunning(strProcess)
    Dim Process, strObject
    IsProcessRunning = False
    strObject = "winmgmts://."
    For Each Process in GetObject(strObject).InstancesOf("win32_process")
    If UCase(Process.name) = UCase(strProcess) Then
        IsProcessRunning = True
        Exit Function
    End If
    Next
End Function

Set objShell = Wscript.CreateObject("Wscript.Shell")
If NOT IsProcessRunning("vcxsrv.exe") Then
    objShell.Popup "We will launch vcxsrv.exe first!", 1, "VcXSrv is not running", 64
    objShell.Exec("C:\Program Files\VcXsrv\vcxsrv.exe :0 -ac -terminate -lesspointer -multiwindow -clipboard -wgl")
End If
args = "-c" & " -l " & """DISPLAY=:0 terminator"""
WScript.CreateObject("Shell.Application").ShellExecute "bash", args, "", "open", 0
Save this file as terminator.vbs. You can simply double click the .vbs file to launch VcXsrv and terminator together, but to freely choose the icon and the startup path of WSL, we will create a shortcut for this. Here is how.
-
Right click somewhere to create a shortcut. Just link to any arbitrary thing, as we are going to change it anyway.
-
Right click the shortcut we just created and choose ‘Properties’. Change the ‘Target’ to
C:\Windows\System32\wscript.exe path_to\terminator.vbsand ‘Start in’ to%USERPROFILE%if you want to make your windows home folder the startup directory for WSL. (This is something you might want to change this option for you own need.) Then download a nice icon and use it for this shortcut.
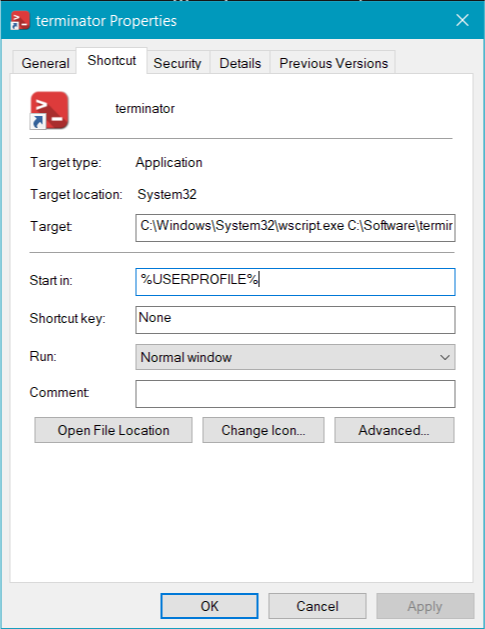
You can find the icon I am using over here.
- Now you can use this shortcut to launch terminator. You can pin this shortcut to your start as well.
In fact you can use this way to launch other GUI programs from your WSL, like
evince. You just have to change ‘terminator’ to ‘evince’ in the script.
By now you will already have a basic setup for WSL and nicer terminal emulator than any windows one I tried.
For WSL 2
Note: As I wrote in the beginning of the document, for WSL 2, at present,
change DISPLAY=:0 to DISPLAY=IP:0, where the IP will be something in your
/etc/resolv.conf.
Alternatively, the smart way will be replace the args in the .vbs script
args = "-c" & " -l " & """DISPLAY=:0 terminator"""
with
args = "-c " & """DISPLAY=$(cat /etc/resolv.conf | grep name | cut -d' ' -f2):0 terminator"""
This will automatically take the IP address in the /etc/resolv.conf and use
it to launch terminator.
Optional Configurations
There is something we can do to make our Linux environment work better. They may not be useful to you, so I list them in ‘optional’ part. Here is the list.
- Run VcXsrv First When Launching Windows Terminal
- Get Correct Unix Permission for NTFS
- Configure OpenSSH Server on Windows
- Enable X11 Forwarding for SSH
- Share .ssh Folder between Windows and WSL
Run VcXsrv First When Launching Windows Terminal
I’m using Gnuplot a lot which relies on X display and lazy to launch VcXsrv
manually. If you are using the Terminator way, VcXsrv is
always launched first with the VB script. To do the same thing for the Windows
Terminal, I have found two ways.
Launch VcXsrv inside WSL
There is no doubt that you can run vcxsrv.exe in WSL easily, but unlikely
running it in cmd, doing this in WSL will keep your terminal occupied by the
command as the output unless you terminate it.
To overcome this problem, I’m using Python’s subprocess.
python -c 'import subprocess as sp; p=sp.Popen(["/mnt/c/Program Files/VcXsrv/vcxsrv.exe", ":0", "-ac", "-terminate", "-lesspointer", "-multiwindow", "-clipboard", "-wgl", "-silent-dup-error"])' 2>/dev/null
You can use either Python 2 or Python 3, but I think Python is always there, so
for safety and compatibility, Python 2 is used here, though I only write Python
3 codes. -silent-dup-error argument will suppress the duplicated display
error, so that we don’t have to check if VcXsrv is already running or not. (If
you really want to do this, tasklist.exe is the way to go.) 2>/dev/null
will silent any other messages, so we will have a fresh terminal.
Add this line to your dot files, like .profile, .bashrc, .bash_profile,
.zshrc, etc. Now you don’t have to manually launch VcXsrv any more.
With A vbs Script
Apparently we can use the same logic used for Terminator to check and launch VcXsrv and then launch WSL in the Windows Terminal.
I’m going to change the script a little bit
Function IsProcessRunning(strProcess)
    Dim Process, strObject
    IsProcessRunning = False
    strObject = "winmgmts://."
    For Each Process in GetObject(strObject).InstancesOf("win32_process")
    If UCase(Process.name) = UCase(strProcess) Then
        IsProcessRunning = True
        Exit Function
    End If
    Next
End Function

Set objShell = Wscript.CreateObject("Wscript.Shell")
If NOT IsProcessRunning("vcxsrv.exe") Then
    objShell.Exec("C:\Program Files\VcXsrv\vcxsrv.exe :0 -ac -terminate -lesspointer -multiwindow -clipboard -wgl")
End If
It will only launch VcXsrv if it is not running.
Go back to the profiles section in the profiles.json file. Change/modify
the commandline key of WSL to the following
"commandline" : "wsl.exe -d Debian -- wscript.exe c:/terminal.vbs & wsl.exe -d Debian"
c:/terminal.vbs is the absolute Windows path of VB script above. -d
specifies the distro. The first -d is not necessary, but the second one has
to be the one you want to launch. -- will pass the following argument before
the & as-is and run it without using the shell, so the first part of this
command will only use WSL to run a Windows command to launch a Windows program
and the second part will actually launch WSL. I know this one looks completely
dumb, but this is the only way I found the actually fulfill the job.
Alternatively, you can run the VB script in your dot files, though I haven’t tested this way myself.
Get Correct Unix Permission for NTFS
Microsoft introduce a file called wsl.conf to auto configure WSL. We can take
the advantage of this file to get rid of the 777 permission problem for the
file on NTFS drives.
Just create /etc/wsl.conf and add the following contents
[automount]
enabled = true
options = metadata
save and then go to services in Windows to restart lxssmanager process.
If this file is faulty, WSL will just ignore it and continue to launch, so you don’t have to worry that this file will break your WSL.
Configure OpenSSH Server on Windows
When we enable developer mode, the OpenSSH client is already installed. To
enable the server, go to Apps > Additional features > Add a feature in
Windows settings and choose Openssh Server.
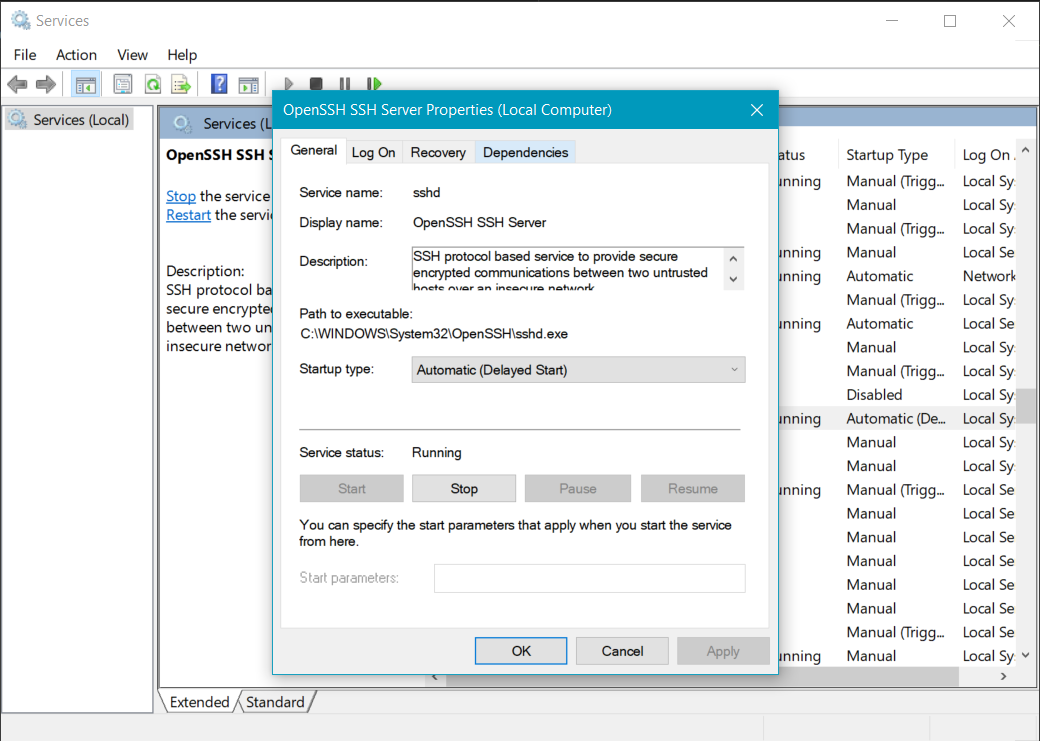
Then go to Services, set Openssh SSH Server to Automatic and manually
launch it for this time.
Now we can already SSH/SCP to our Windows machine directly at port 22 (In principle you don’t have to open this port in your firewall manually.), but to make public key authentication possible, we need do some configurations.
First, we need configure sshd_config in %programdata%\ssh, i.e.,
C:\programdata\ssh. Note: you need admin privilege to modify this file.
Uncomment line
PubkeyAuthentication yes
and comment out lines
#Match Group administrators
#       AuthorizedKeysFile __PROGRAMDATA__/ssh/administrators_authorized_keys
as we want to use the authorized_keys file in %userprofile%\.ssh folder.
Then generate SSH keys. Open cmd or PowerShell window and type
ssh-keygen.exe -t rsa
to generate keys.
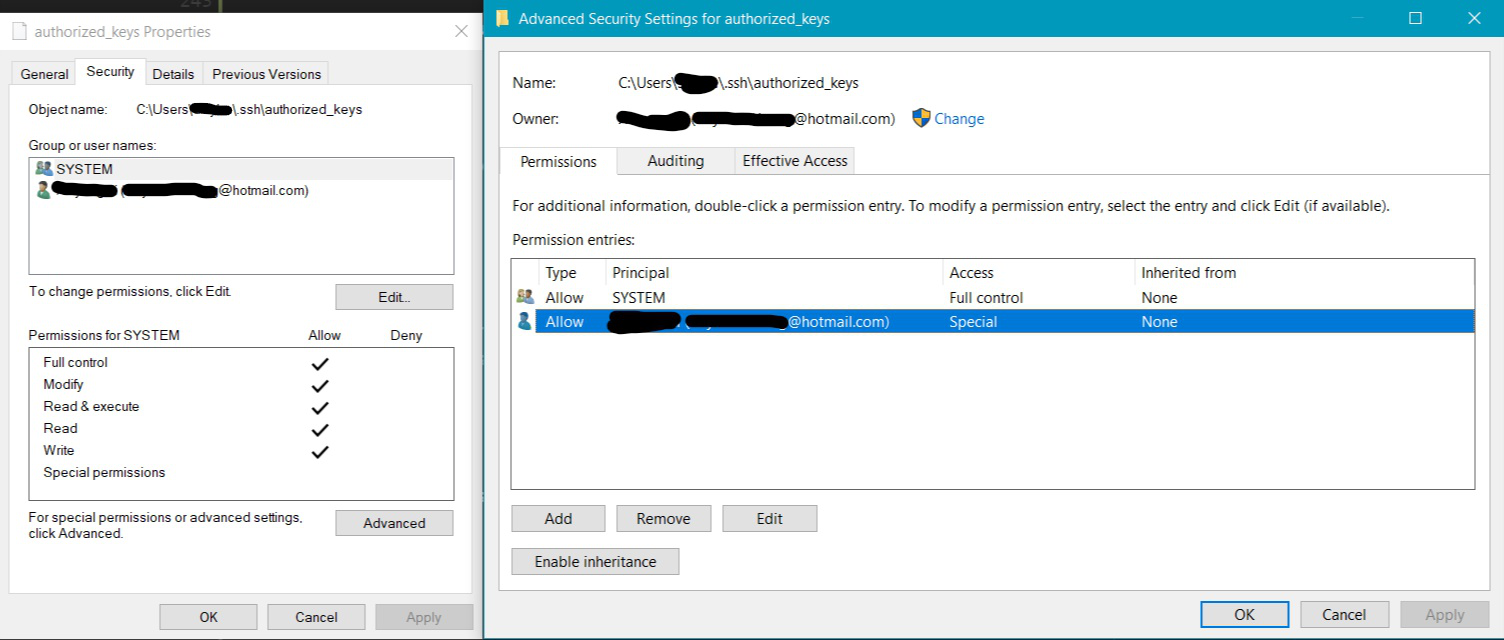
Next, we need create file authorized_keys and set the ACL permission.
This step is very important. Without correct ACL (not Unix) permission,
public keys won’t work. Open Properties for authorized_keys and go to
Security tab click Advanced. Disable ‘inheritance’ and delete all
entries other than ‘SYSTEM’. Add an entries for our own account to have
read and write permission, so that we can modify the file, but this entry must
not have full control over the file. See photo below.
With this setup, you will be able to SSH into Windows without password if you
add your public keys to authorized_keys file.
One thing to note for SCP to Windows is that the path should be
windows_user@host:disk:/path, e.g., doe@localhost:c/Users.
Enable X11 Forwarding for SSH
Personally, I need visualize some data or figures on the remote host, so X11 forwarding is very important to me. However, enabling this option in WSL is kind of ambiguous. I struggled several times and checked multiple sources, but I’m not sure which step is necessary. Nevertheless, this way indeed works.
First of all, install OpenSSH server for WSL
sudo apt install ssh
and then modify /etc/ssh/sshd_config file like this block below, by either
uncommenting or adding.
Port 2222
AddressFamily inet
ListenAddress 0.0.0.0
PermitRootLogin no
AllowUsers your_user_id
PubkeyAuthentication yes
PasswordAuthentication yes
X11Forwarding yes
X11UseLocalhost no
Note that since I enabled OpenSSH server for windows, too and would like to keep default 22 port for it, the one for WSL is changed to 2222.
Then run command
xauth add :0 . `mcookie`
to obtain correct authentication.
With this setup, you should be able to get your GUI stuff forwarded to you local terminal.
Share .ssh Folder between Windows and WSL
Now you have two SSH server running, one in Windows and one in WSL, so you might think of sharing the public key and authorized keys between them. It is indeed possible, but maybe keeping two sets of .ssh folders is better.
You can find the reference here.
First of all, make sure you enabled metadata for NTFS stuff like
this, so that we can get the Unix
style permission persistent for Windows files.
Then create a symbolic link between the .ssh folder in your %userprofile% and
your WSL $HOME.
ln -s /mnt/c/Users/windows_user/.ssh ~/.ssh
Set correct permission for files after that. They are like the following.
-rw-r--r-- 1 user user 1.6K Apr  9 13:22 authorized_keys
-rw------- 1 user user 1.7K Apr  9 09:58 id_rsa
-rw-r--r-- 1 user user  394 Apr  9 09:58 id_rsa.pub
-rw------- 1 user user  11K May  5 00:14 known_hosts
-rw------- 1 user user 1.4K Apr 18  2017 known_hosts.old
Finally, disable strict modes in your sshd_config. Warning: this isn’t a
good practice, but I can’t make it work without this.
StrictModes no
So now you can keep one copy of id_rsa.pub and authorized_keys for both
Windows and your WSL.