Set up a centralized mail relay with Postfix
This has always been a pain to set up mail relay on every single LXC or VM. Apart from critical services like Proxmox itself or xpenology, I used to live without any email notifications from most of my services.
Yesterday, I suddenly realized that I could set up a centralized mail relay and forward all emails from other servers through it. After some research, I finally decided to set up a centralized mail relay using Postfix running inside a dedicated host and then configure all other servers to relay emails through it. For other servers, a full solution like Postfix is an overkill, so I used lighter alternatives like msmtp for simpler setups.
The overall architecture
We use a dedicated Alpine LXC running Postfix as the mail relay. All other
servers (clients) will forward their emails to this mail relay using msmtp. As
Macrohard
has made it a lot harder to use outlook as a relay service,
we will use Gmail as the final mail delivery service to deliver emails to your
own mailbox.
graph LR
    A[Client Servers] -->|Forwards via msmtp| B(Mail Relay<br><i>Postfix on Alpine Linux</i>);
    B -->|Relays to| C(Gmail);
    C -->|Delivers to| D[Recipient Address];

    style A fill:#2980b9,stroke:#333,stroke-width:2px
    style B fill:#d35400,stroke:#333,stroke-width:2px
    style C fill:#2980b9,stroke:#333,stroke-width:2px
    style D fill:#d35400,stroke:#333,stroke-width:2px

    subgraph Your Home Network
        A
        B
    end

    subgraph The Internet
        C
        D
    end
Set up the mail relay
Note that as we are working in the context of LXC/VM inside Proxmox, very likely
you are running as root anyway. If you are not, please prepend sudo to all
commands.
-
As usual, set up an Alpine LXC in your Proxmox host. It is hard for me to imagine that in a home lab setup you will need any resources for this relay. For my own case, the LXC has not used more than 30MB of RAM and 2.5% of 1 vCPU in the past day.
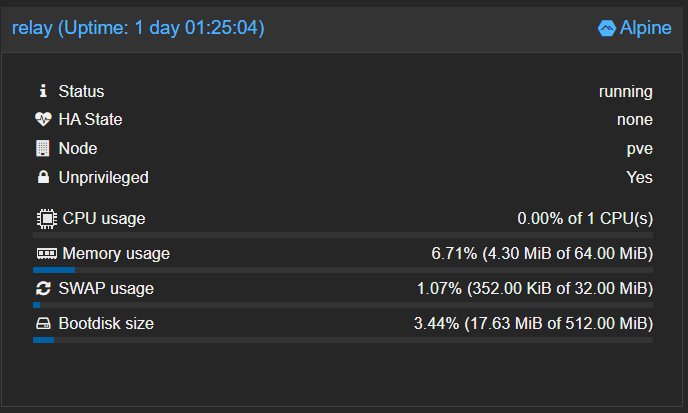 Even 64MB of RAM should be enough for this LXC.
 - Install Postfix and other dependencies.
apk update
apk add postfix
Yes, for basic authentication, this is all you need. You do not even even need stuff like
cyrus-sasl. - Configure Postfix. Edit the file
/etc/postfix/main.cfand add the following lines at the end of the file.myhostname = mail.yourdomain.com relayhost = [smtp.gmail.com]:587 smtp_sasl_auth_enable = yes # Alpine uses lmdb instead of hash smtp_sasl_password_maps = lmdb:/etc/postfix/sasl_passwd smtp_sasl_security_options = noanonymous smtp_sasl_mechanism_filter = plain login smtp_use_tls = yes smtp_tls_security_level = encrypt smtp_tls_CAfile = /etc/ssl/certs/ca-certificates.crt # Allow other servers on your LAN to relay through this one mynetworks = 127.0.0.0/8 [::1]/128 192.168.1.0/24Replace
mail.yourdomain.comwith your own domain name, though it will not do anything anyway. Therelayhostis set to Gmail’s SMTP server. If you LAN IP is not192.168.1.x, change it to your own LAN IP range. - Create an app password for your Google account. Google has
well-written instructions here.
Create a file
/etc/postfix/sasl_passwdwith the following content:[smtp.gmail.com]:587 your_email@gmail.com:your_app_passwordThen create the database
postmap /etc/postfix/sasl_passwd chmod 600 /etc/postfix/sasl_passwd.lmdb - Restart Postfix.
rc-service postfix restart - Now we can test the mail relay. Use the following command to send a test email:
echo "Subject: Postfix Relay Test Email" | sendmail -v toosimple@outlook.com; tail -f /var/log/messagesThe log file
/var/log/messagesshould show that the email is sent successfully. If there are any errors, check the Postfix configuration and ensure that the app password is correct and the service is running. - If everything works as it should, ad postfix to the default services to
start on boot:
rc-update add postfix default - Finally, the plaintext password is no longer needed, so we remove it for
security reasons. Run the following command to remove the plaintext password
file:
rm /etc/postfix/sasl_passwd
Set up the client servers
Some servers may have Postfix installed already. You can keep using it for communicating with the mail relay. However, it is really an overkill for this use case. Consider stopping the service and disabling it. The command could be distro-specific, so I will not include it here.
- Install
msmtpon the client server. For example, on Debian/Ubuntu:sudo apt install msmtpOn Alpine, use
apk add msmtp - Create the configuration file
/etc/msmtprcaccount default host 192.168.1.100 # LAN IP or hostname of your central mail relay port 25 auth off from "A fancy name for your client" <what@ever.yourdomain.com> logfile ~/.msmtp.log # /var/log/msmtp.log somehow causes permission issuesFor the
fromfield, you can use any name and email address you like. However, Google will not let you use a random email address, so the sender address will always be overwritten to your Gmail address. The sender name, though, will remain as you set it, so make it something recognizable for each client server. - Override the default
sendmailcommand to usemsmtp. Create a symlink to/usr/bin/msmtp:mv /usr/sbin/sendmail /usr/sbin/sendmail.bak # optionally back up the original sendmail ln -sf /usr/bin/msmtp /usr/sbin/sendmailSome systems have a real
sendmailbinary, so you may want to rename it. For systems like Alpine, thesendmailcommand is just a symlink, so you can simply overwrite it withmsmtp. If you are not sure, check it out withls -l /usr/sbin/sendmail. - Test email from the client
echo "Subject: relay rename testing" | sendmail -v your@email.comIf everything is set up correctly, you should receive the email in your inbox shown as sent from “A fancy name for your client (your@gmail.com)”.
Conclusion
With this set up, all your client servers can now send emails through the
central mail relay with minimal configuration. For services like immich where
a SMTP server is built-in, you can simply set the SMTP server to the IP address
of the mail relay and port to 25.
Home Lab Self-hosted Proxmox